3. Usage
3.1. Prerequisites
Ensure you have installed the AML Dashboard using one of the following methods:
3.2. Execution
To run the AML Dashboard, follow the steps below:
3.2.1. Backend Server
Run the following commands to start the backend server:
Navigate to the
backenddirectory.
cd backend
Start the server:
python3 server.py
3.2.2. AML-IP Nodes
Depending on your requirements, you can run different types of AML-IP nodes:
3.2.2.1. Manual Execution
Load the AML-IP environment
source /AML-IP/install/setup.bash
Navigate to the
backenddirectory.
cd backend
Computing Node
To run a Computing Node, execute:
python3 computing.py
You can run multiple computing nodes simultaneously. Each computing node will continuously await job assignments. When running multiple nodes, they will collectively distribute the workload, optimizing the time to find a solution.
To stop a computing node, simply run ctrl+C.
Model Manager Sender Node
To run a Model Manager Sender Node, execute:
python3 sender.py
To stop a Model Manager Sender Node, simply run ctrl+C.
Inference Node
To run an Inference Node, execute:
python3 inference.py
To stop an Inference Node, simply run ctrl+C.
3.2.2.2. Automatic Execution
To automatically run the AML-IP nodes, follow the steps in the Manage AML-IP nodes with the AML-Dashboard section.
3.2.3. AML Dashboard
To run the dashboard, follow the steps below:
Navigate to the
frontend/aml_dashboarddirectory.
cd frontend/aml_dashboard
Start the dashboard:
npm run dev
With the AML Dashboard up and running, you can access it at the following address:
http://localhost:5173/
3.2.3.1. Data Management Tab
There are several options available for dataset creation:
Record hand gestures.
Choose
Sensorsfrom the drop-down menu in the Choose the model for the training set section.Activate the
videoswitch in the webcam section to enable webcam capture.Specify the label of the dataset in the Instance label section.
Click on the
Hold to record instancesbutton in the Capture instances to the training set to start recording instances.Once recorded, the dataset will be promptly displayed in the dataset browser section for easy access and management.
Select a standard dataset from the system.
Choose a dataset from the drop-down menu in the Choose the model for the training set section.
Click on the
Load datasetbutton to load the selected dataset.The dataset will be displayed in the dataset browser section for easy access and management.
Load a custom dataset.
Warning
The custom dataset must be in the correct format to be loaded successfully. This is explained in the Collecting data tutorial.
Choose
Customfrom the drop-down menu in the Choose the model for the training set section.Click on the
Load datasetbutton to load the custom dataset.A popup will appear, allowing you to select the desired dataset from your local machine.
Once loaded, the dataset will be displayed in the dataset browser section for easy access and management.
Note
In order to be able to train a model, you must have at least two classes in the dataset.

3.2.3.2. Training Tab
To train a model using AML, follow these steps:
Note
Please ensure that at least one Computing Node is running to facilitate the training process.
Specify the number of parallel trainings (executions) you wish to run.
Define the number of iterations per execution.
Set the percentage of dataset to distribute in each execution.
Specify the target class when the classification is binary (this is the case when standard or custom datasets are used).
Optionally, an atomization file can be uploaded to the system, allowing to start the training process with a pre-trained model.
Click on the
Trainbutton in the AML Training Launcher to initiate the training process.Once the training is completed, the model status will appear as Finished :) in the AML Status.
If the training process fails, an error message will be displayed indicating the reason for the failure.

3.2.3.3. Fetching Tab
To fetch a model, follow these steps:
Note
Make sure that at least one Model Manager Sender Node is running to facilitate the model fetching process.
Click on the
Search for statisticsbutton in the AML Statistics Fetcher.Once the statistics are received, the status will appear as Statistics received ! in the AML Collaborative Learning Status.
Click on the
Request modelbutton in the AML Model Fetcher.Once the model is received, the status will change to Model received ! in the AML Collaborative Learning Status.
If the fetching process fails, an error message will be displayed indicating an error.

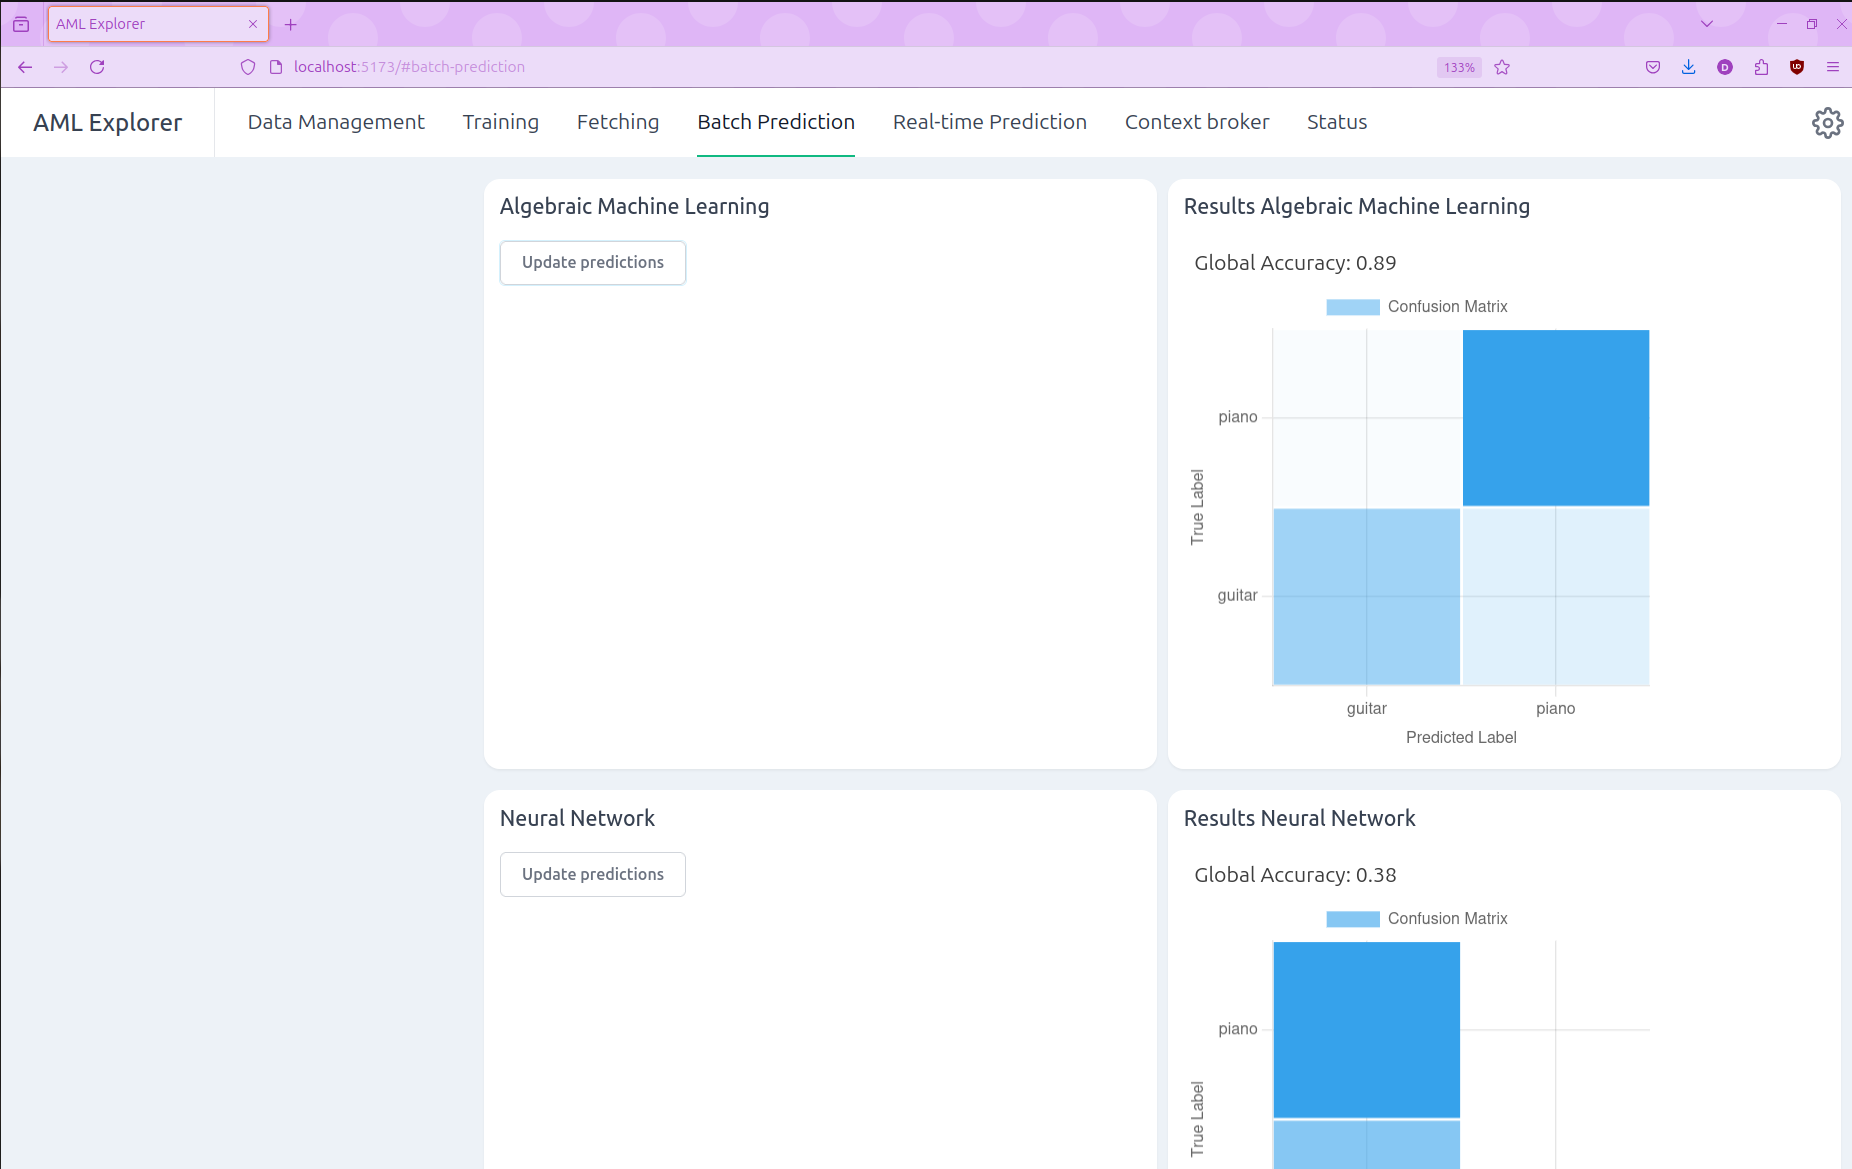
3.2.3.4. Batch Prediction Tab
To predict the output of a dataset, follow these steps:
Note
Ensure that you have access to at least one AML Model to facilitate the batch prediction process.
Click on the
Update predictionsbutton in the Algebraic Machine Learning.The predictions will be displayed in the Results Algebraic Machine Learning plot.
3.2.3.5. Real-Time Prediction Tab
Warning
This feature is only available when the dataset is Sensors.
To predict the output of webcam images in real^time using an AML Model, follow these steps:
Note
Ensure that you have access to at least one AML Model to facilitate the real^time prediction process.
Toggle the
predictionswitch in the Predict for AML section and activate thevideoswitch in the webcam section.The predictions will be displayed in the Results AML plot.

3.2.3.6. Context Broker Tab
To create and update data to the Context Broker and get the solution (inference) from the AML Model, follow these steps:
Note
Make sure that the Context Broker is running to ensure successful interaction and data exchange. The Context Broker can be installed and configured by following the instructions provided here.
Specify the Fiware Node parameters and Context Broker entity ID and attributes.
Click on the
Createbutton to create the node using the provided parameters.The Fiware Node Status will update to indicate whether the node has been created successfully.
Drag and drop an image or upload a file in the designated area to upload data.
Click the
Post Databutton to send the data to the Context Broker.The Data Status will update to indicate whether the data has been successfully posted.
Once the solution is received, it will be displayed in the Context Broker Solution section and the Solution Status will update to Solution received ! to indicate successful retrieval.
If the solution retrieval process fails, an error message will be displayed indicating an error.

3.2.3.7. Status Tab
The status tab automatically refreshes every second, ensuring you receive real-time updates and information about the network’s status.
